Candy Cane decor continued - a light fixture?


We converted an old tobacco drying basket into a light fixture by suspending it upside down over a chandelier.  We have beautiful edison bulbs in it that give off a very mellow glow.  I was chewing on a large candy cane while making the candy cane wreath and then a light went off..haha I started draping the large candy canes over the wire basket.  I love the look- added just the right amount of Red colored fun to the dining room.
And bonus, if hungry you can just grab one and eat it.  :)


A Candy Cane sort of holiday wreath


We have all of our holiday items in storage in NC except for our one artificial tree and family ornaments.  So decor is being made up of things we have or can purchase cheaply.
I am a neutral gal- you know that.  Beige linen, burlap, white and browns..but Christmas is a time to bring in some fun RED.  And what better red than Candy Canes.

I just purchased a Styrofoam wreath then hot glued all these miniature candy canes on it.  Add some red checked ribbon and voila- very fun wreath.
It was on the coffee table and I kept seeing our dog, Boone licking it.

I love red at Christmas.

tobacco drying basket into a light?


A beauty isn't she?  Lets backtrack a bit.  We are in base housing in Texas.  The lighting is some form of cheapest thing they could buy in bulk that holds one 40 watt bulb and gives off enough light to make you go blind.  We have changed out most of the lighting so we all don't need glasses.  For the dining room I had a tobacco drying basket that I bought at The Depot at Gibson Mills in Concord, NC.  Now if you have not been there you have no idea how much wonderful-ness you are missing out on.  It is one of my favorite places to shop.  
Anyway, I bought this basket - it came with a tip and also a stand.  I was told it was used to dry tobacco.  When I saw it I knew I wanted it for a light fixture but I didn't buy it.  When I went back a few weeks later it was still there and still calling to me- so of course I had to get it. 


Now we moved to Texas and we moved it with us.  I began a search for a fixture to put inside.  I was looking at a very girlie one with lots of crystals but chose to go much simpler and cheaper. 


I bought this ugly brass - been in every builders home imaginable.  But it was getting ready for a transformation. 


Oh yes..nothing a can of oil rubbed bronze spray paint can't take care of. The globes were thrown away because they were hideous. 


The next step was hiding the chain and wires - did not want those to show.  So, burlap to the rescue.  I just took a roll of burlap ribbon and sewed up one side to make a sleeve. 


The last step was adding some beautiful Edison bulbs.  I love how it turned out.


Working at Marta's part 3 - her shop

Her shop.  It seems a simple phrase, but nothing Marta does is simple.  That is what makes it beautiful.
Welcome to Marta's Room Antiques: I'll just let you wander- it is how most of us do it. 


Her shop is an overload of the senses. You have to go around at least three times to see it all.  There is so much going on that one walk through does not hit it all.  Marta has the talent for display- amazing natural talent. And her shop is different every time I go to visit.

*** I did not take these photos.  I borrowed them from Marta's fb page.  

Working at Marta's part 2


Day 2 of Marta's Room Antiques Fall Vintage Show.  Marta has a ton of inventory so at her shows she puts her "overflow" into one of her work buildings. 
This was the lovely booth space my friend Liz and I got to work.  It is Marta's overflow.  Of course, if you know Marta then you know she does nothing part way so this was decorated to the nines.  I wish I had half her talent of display.

I love all the windows.  And aren't those lockers wonderful?


If you loved this space just wait until part 3 when I share her main store.  It is open year round and you will want to visit it. 
Stay tuned.

Working at Marta's part 1


My friend Marta Ramos has a sale twice a year at her place, Marta's Rooms Antiques.   I have been wanting to attend it for years.  I have actually wanted to set up and sell at one but helping work one of her spaces with my best friend Liz is a great time too.  
I took some pictures of some vendors before we started working.  Not many as it got busy really fast.

This was a very cute set up.  She used Marta's carport as the basis.  Loved the strip of fabric garland across the top. 


She had a purse that Sophie really wanted.  Maybe next time I said.  It is lovely.


These are awesome people we met that drive down once a year from Michigan to sell their awesome finds.  Krista has invited me to come junk with her once we are settled.  I can't wait to do it.  Look at that sleigh- is it not beautiful?  They sold out everything except 5 items by 1pm the first day.


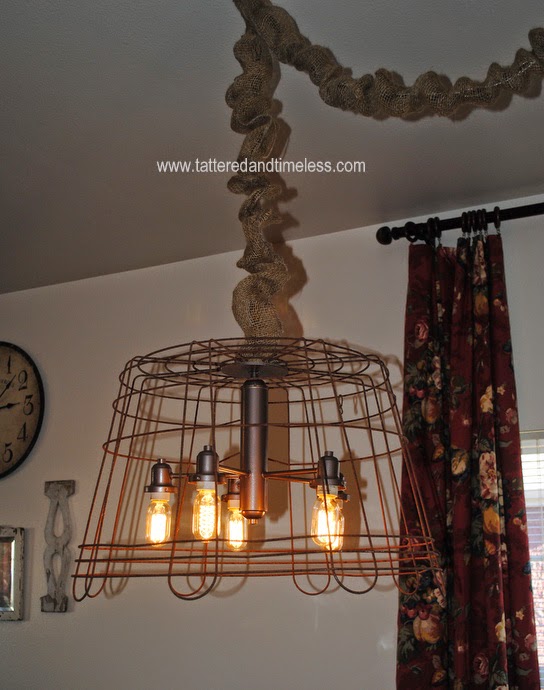
I loved this booth set up.  They actually covered the whole top of the tent with sewn together burlap bags then draped burlap to hide the poles.  It was a fun space - Shades by Fran.


This was a fun space- had some things I'd like to have had. :)


This woman sets up at Warrenton in Round Top.  Her items were to die for.. Many that were screaming my name.


Look at these canisters...glass, chalkboard and rusty tops- hear the angels singing?


Another booth with amazing finds.  I actually bought a bunch of project pieces from the nice lady behind this booth.


I wish I had been able to take more pictures but we were slammed with customers.  That is a good thing and what I was there for.
I did manage to get some photos of Marta's overflow building we were working in and then I'll share some photos someone else took of her main building- oh my goodness - her skill at display is second to none.

She holds this sale twice a year - November and April- if you are anywhere close to Belton, Texas you should plan to hit the next one.  You will not be disappointed.

Sophie aka The Queen of Hearts

I sew.  I like things that are not like others.  My daughter knows this and always wants her Halloween costumes handmade so she is different than anyone else. 
This was her inspiration:


Yes, no pressure.  Not at all.
First we had to buy the supplies- that means lots of tulle.  Lots of hard to work with tulle.


We could not find any harlequin ribbon anywhere.  We looked everywhere.  So, I had to make my own.  Yes white cotton fabric and black marker.


In process, looking pretty good.


I think it looks great.  Well it looks good on my dress dummy.  I hope it looks even better on Sophie.


The Queen - love her makeup.


All hail the Queen. 


Off with their heads.  She rocked this costume. 

halloween 2014

Its that time..

That crazy time we call Halloween in base housing.  With 100+ homes to trick or treat at it is a mad dash to get all the candy you can.


These two were excited to hit the neighborhood.


This was the first request for a picture together- yep they'd rather eat broken glass.  haha

But after reminding them that mom is the one that makes this night possible they could at least be grateful and give me a picture.


I just love it when a good old guilt trip makes it all work out. :)

I think they look very scary, odd and weird.  The three qualifications are met.

Happy Halloween Jack & Sophie. 

off with their heads

Time for the fitting...hope it works.

Here she is excited to see it done.


The day and night look all together. 


First job was to get the shirt on - do the hair and crown and then the God awful makeup. 


She especially liked the little heart on the lips.  The girl loves any reason to get to wear lipstick out in public.  How about those bad 80's throwback blue eyes..haha


OFF WITH THEIR HEADS!!!

I think Queen Sophie has spoken.


She loves it.

And the awesome thing is it will work for the next school year when her school in NC does the book character day on Halloween.


the queen of hearts

Sophie did not want to wear her angel of death costume for a third year and I don't blame her.  So, she came up with the Queen of Hearts from Alice in Wonderland.  Now my girl does not like any cutesy costumes they need to be weird, scary or just plain odd.  This look hit two of those.

I did not use a pattern but found an inspiration photo and went from this:


I started with a pile of stuff: black and red fine tulle for the outer skirt, black stiff tulle for the underskirt, a black t shirt, some white tulle for the collar, felt and some trim.


Tulle is a pain in the butt to work with.  It slides all over when sewing it.  And with many layers it is even more difficult to do.


The original had harlequin ribbon.  It was a key part of the look.  We hit all the craft and fabric stores in town but no ribbon was to be found.  Heck not even any harlequin fabric could be found.  So, I had to make my own.  It was more difficult figuring out how to draw it then to get it all done.  I used plain white cotton and then colored the harlequin with Sharpe marker.  The equivalent to duct tape - works in a pinch always :)


 The first fitting was going well.


 I finished it while Sophie was at school.  It looks good to me..


It looks great on my dress form - Josephine.  I hope it looks even better on Sophie.


We shall see how it fits her.